If you are interested in gardening or have a green thumb, hydroponic gardens are probably familiar to you. Working with a hydroponic system is optional.
The majority of gardeners follow conventional gardening practices, such as applying soil, fertilizer, etc. But is it a practical method?
Not in my opinion. A system that is time-bound is hydroponics. We now have a more sophisticated hydroponic growing method. Plants can be grown in a tower.
You did really hear correctly. In the tower, we can essentially grow anything. It is the most convenient thing there is.
First of all, growing a large number of veggies in a short space requires no soil or fertilizer application. This is a major advantage. Finally, the tower can be moved at any time and any place. It can be kept anywhere you choose, whether it’s indoors or outside.
Related Article: The Ultimate Guide to Organic Gardening
You may also read: The 14 Best Tips For Designing A Small Garden
Related Article: The Ultimate Guide to Choosing the Right Aeroponic Tower Garden
You may also read: Best Gardening Tips for Beginners: Cultivate Your Green Thumb
Hydroponic Tower
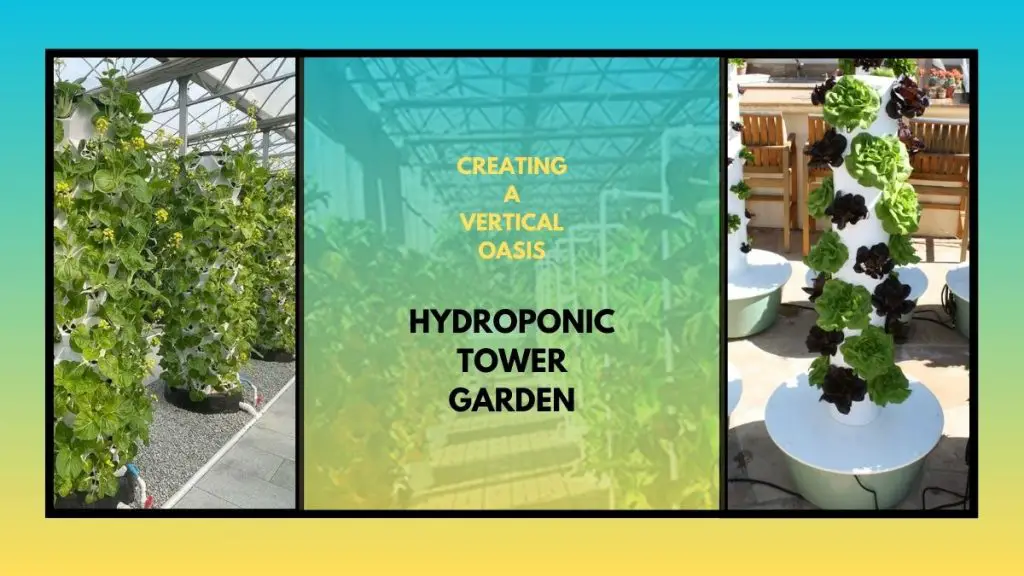
A technique called hydroponics uses water to supply mineral nutrients to plants as they grow vertically or horizontally without the need for soil. Using traditional hydroponic methods in a vertical, gravity-fed system is how vertical hydroponics operates. The water that is rich in nutrients is fed from above and gathered at the bottom.
By building a hydroponic garden tower out of layers of vertical planters, a high-quality hydroponic vertical garden is a very effective way to cultivate your own herbs and veggies.
Why hydroponic towers?
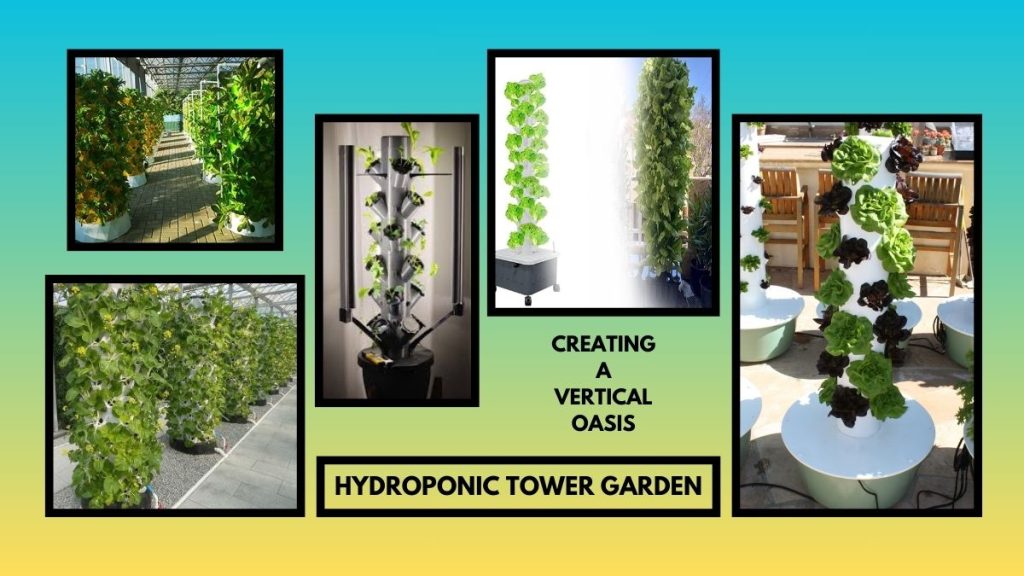
Anyone, regardless of climate, resources, or yard size, may now grow fresh, tasty fruits and vegetables thanks to garden tower projects.
The purpose of vertical hydroponic systems is to maximize the output of your vertical hydroponics tower, minimize water consumption, and deliver exceptional results with little effort. Our selection of vertical hydroponic gardens can be used as tower gardens with regular soil or as hydroponic vertical gardens.
How does a hydroponic tower work?
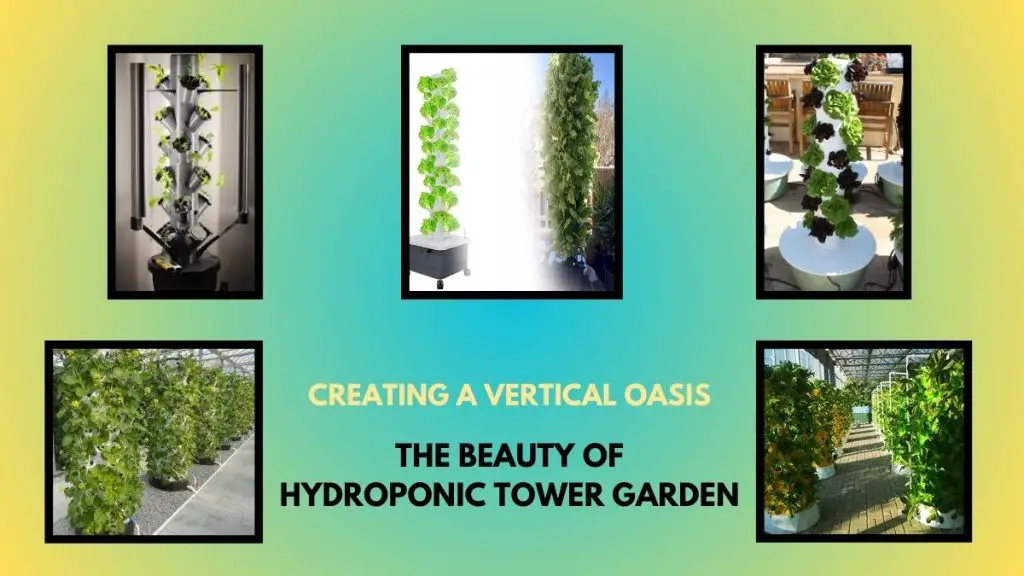
For organic farming, this hydroponic system is vertical. It takes little work to grow fresh food with this hydroponics equipment. This machine uses very little electricity. It moves water around the grow tower.
This tower is a mobile, reusable, and portable ecosystem built to grow vertically with the highest level of accuracy and output.
Particularly intended to provide the best controlled environment feasible for a variety of agricultural products to be cultivated in an array of climates and situations. You get noticeably larger yields in a shorter amount of time.
How to build
Just like Anna from Frozen, I want to sing, “Do you wanna build a hydroponic tower?”
Come with me if you’re serious about creating a hydroponic tower garden. I will provide you with all the information required to construct a hydroponic tower garden today.
Materials:
Take out your pen or pencil to make a list. The items you needed were:
- A 5-gallon food-grade bucket with a lid
- A 7 ft. long 4-inch PVC pipe
- A 10 ft. long, 1 1/2-inch PVC pipe
- PVC solvent cement
- A 4-inch PVC collar
- A 4-inch PVC bracket
- A 5-inch PVC square
- A 6 ft. long, 1/2-inch poly tubing
- A 1/2-inch barbed tee
- Aquarium-safe silicon
- Two 1 1/2-inch bolts with nuts
- A submersible pump that can pump up to 6 feet
- Twenty 2-inch net cups
- Seedlings of your choice
- Nutrient solution for hydroponics
- Hydroton or other growing medium
Tools:
- A drill with 3-inch bits
- A miter box or saw
- A jigsaw
- A ruler
- A tape measure
- Sandpaper
Related Article: A Comprehensive Guide to Garden Pest Control Makes Garden Beautiful
You may also read: The Top 10 Best Pruning Saws for Gardeners
Related Article: The Ultimate Guide to Garden Tool Organization: Maximize Efficiency
You may also read: Indoor Plant Care Tips for Enthusiasts: Lush Oasis Secrets
Process of Making Hydroponic Tower
Steps to follow:
- Cut a 5″ by 5″ by 8′ white vinyl fence post to the desired height for the tower. Most people may easily reach the recommended height of 5 to 6 feet for vertical structures.
- Using the square template found under the template links on the last page, drill a hole in the plastic sheet used to build the lid so that the fence post (tower) may pass through it.
- Depending on the crop to be produced in the tower, place the net pothole template at the appropriate spacing on the tower. To prevent the pots inside the tower from contacting one another, space out the openings on each side.
- Using adhesive, paste the pothole template onto the fence post.
- Make a hole in one end of the template to accommodate the jig saw.
- Make a pothole that is the same size as the pattern with the jig saw.
- Cut a 3″ PVC pipe at a 45 angle so that it is 2.25″ tall. In doing so, the net pot support will be ready. This works well with 3″ net pots; however, the pothole size and net pot support will need to be adjusted if the net pot size is altered within the tower.
- Using a template for the holes at the base of the tower, cut a rectangle out of the bottom of the structure. This will let the water that is supplied from above escape.
- Position the net pot holder at the base of the tower’s net pot opening. Where the net pot holder needs to be glued, gently rub the surface with sandpaper.
More Steps to Follow:
- After applying PVC epoxy to the net pot holder’s edge, set it, weighted down, in the bottom of the net pot hole and allow it to cure for 2 to 3 hours. Assemble every net pot holder along the tower’s length.
- Take two white vinyl pyramid post tops and use them to prepare the top of the tower. To provide the tower with nutritional solutions, drill a ½-inch hole in the middle and insert a ½-inch tee barb through it.
- To evenly distribute the nutrition solution throughout the tower, drill holes on all sides using the other white vinyl pyramid post top. There should be about ten haphazard holes drilled.
- Using the hinge, fasten the two white vinyl pyramid post tops. Using the second hinge, fasten the top with holes to the tower on the other side. To prevent corrosion, cover the screws with clear silicone used for aquariums.
- Cut one white vinyl blind stop molding measuring 5/8 inches by 5/8 inches by 8 feet into twelve 4-inch pieces. Use sandpaper to gently stroke the side of the component that is to be attached to the tower. Rub the interior of the tower above every net pothole as well. After rubbing the edge, coat it with PVC epoxy and insert it into the tower. This will assist in ensuring that the nutrition solution is distributed evenly throughout the tower.
- Mark the edges of the net pot that contact the top of the net pot hole after placing it in the hole. Here, use a soldering iron to melt the region. This will make it easier to insert the pot into the hole and stop water from flowing along the pot’s edge outside of the tower.
Some More Steps to Follow:
- Cut a small lid with a hinged attachment from a portion of the reservoir’s covering. Use transparent silicone in aquariums to prevent the screws from corroding. This will make it easier to monitor pH and EC and add fertilizer solutions to the reservoir.
- To put a fertilizer supply line through the middle of both towers, drill another hole in the reservoir’s covering.
- A submersible pump should be positioned in the reservoir’s middle, and the nutrient supply hose should be connected to the pump’s outlet.
- To deliver the nutrient solution to both towers, place a T barb on the nutrient supply hose at the same height as the tower.
- To turn the pump on and off, set a timer. The type of crop raised in the tower may affect how often it needs to be watered. For instance, strawberries should only be watered seven to ten times a day for an hour, yet lettuce can be watered continuously for a full day.
- After inserting some enlarged clay balls or other media into the net pothole, cover the balls with the plant. Fill clay balls surrounding the plant as well.
- Put the pump in motion. The water may moisten the plant leaves if you notice it splattering out of the pot. This may result in fungus-related illnesses and ultimately kill the plant. To prevent this, use the link provided beneath the template on the last page to cut an aluminum sheet into a shield the same size as the water splash shield template provided at the end. Place this shield up to the aperture of the pothole above the clay balls.
- Use a bar or some wire to support the tower from the top.
Congratulations! Now you have a hydroponic tower garden!!
Get Cautious:
when you’ve acquired something novel. You ought to take some safety measures. Let’s now discuss what comes next:
- Choose plants that are suitable for hydroponics, such as leafy greens, herbs, strawberries, tomatoes, peppers, etc.
- Check and adjust the pH level of your nutrient solution regularly, keeping it between 5.5 and 6.5 for most plants.
- Change your nutrient solution every two weeks or when it becomes cloudy or discolored.
- Monitor and control the temperature and humidity of your growing environment, keeping it between 65°F and 75°F for most plants.
- Provide adequate light for your plants, either from natural sunlight or artificial lighting sources, such as LED or fluorescent lights.
- Prune and harvest your plants regularly to encourage new growth and prevent overcrowding.
TO KNOW MORE ABOUT HYDROPONIC TOWER GARDEN>>
Related Article: The 11 Best Gardening Tool Sets of Recent Times
Final Speech:
People who lack a lot of gardening experience or who have limited time or space can now farm more easily thanks to hydroponics. Since these towers require investment, we searched for models that offered the possibility of a large return, which might lower your grocery costs and give you access to fresh produce all year.
Gardeners may grow a lot of fruits, vegetables, and herbs in a small amount of space by using hydroponic towers. They’re an excellent choice for inexperienced gardeners or those who want to try indoor gardening without a lot of fuss because they’re also quite adaptable and low upkeep.
Regardless of experience level or available space, everyone who wants to grow their own fruits, veggies, and herbs indoors should think about purchasing a hydroponic tower.
Related Article: The Art of Chaos Gardening: A Unique Approach Gardening
You may also read: The 9 Best Garden Tool Organizers of Recent Times